Showing posts with label Andrew. Show all posts

June 16, 2012

Cocktail Party - Mad Men Style

Last weekend Andrew and I hosted a classic 1960's style, Mad Men cocktail party. Oh so fun!

We dressed up in 1960's cocktail attire. A little consignment dress and vintage cocktail ring for me and a 1960's tie for Andrew. 

And our lovely guests came dressed with 60's flaire as well.


Ali even had her hair done. Isn't it lovely?

And Cherolyn styled her own pin curls. Fab, eh?

After all the picture taking (because, really, when are we all dressed up this nicely?) the cocktails began.


Andrew was our bartender. He is good. Really. Andrew served up cocktails from the 1960's. On the cocktail menu: Lime Gimlet, Old Fashioned, Tom Collins, Mojito and a Manhattan. 

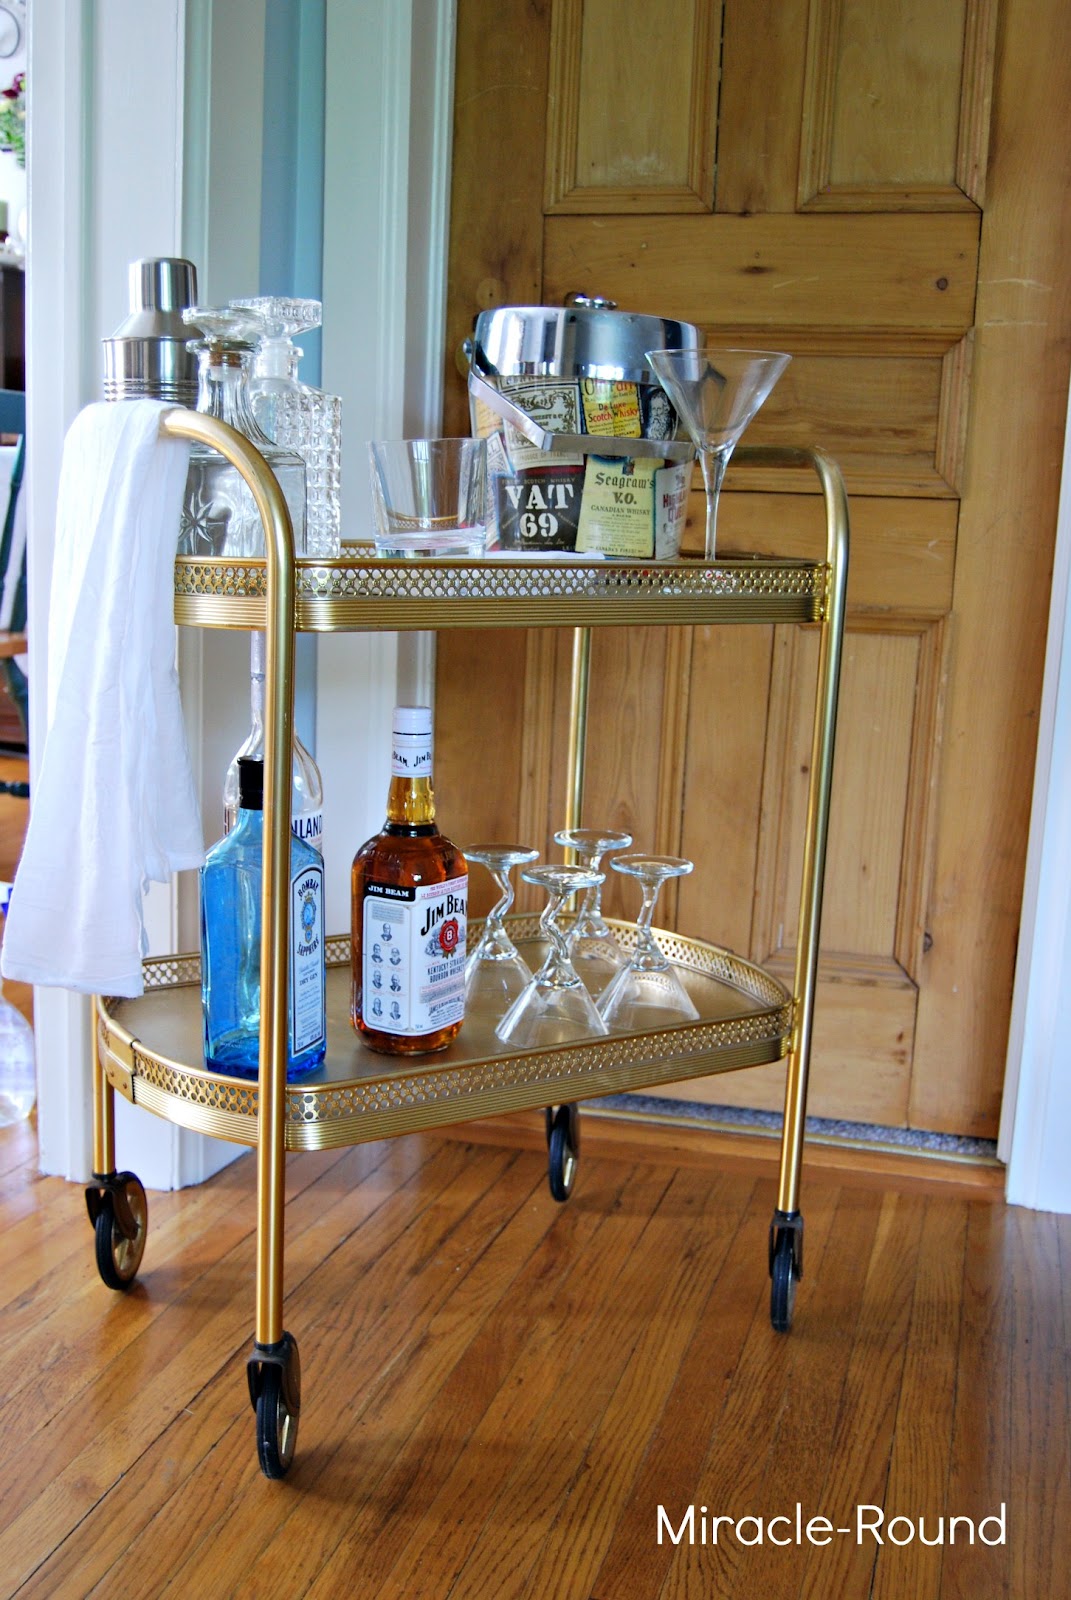
The bar cart normally acts as Andrew's bedside table, but for this occasion it was put to its original use. Complete with a vintage ice bucket.

 Although we have some rock and martini glasses, we were in need of more for the party. Thankfully kind friends lent us theirs. Using a china marker, we wrote Men Men on the bottom of our glasses so we could easily tell them apart.

As for the borrowed martini glasses, we simply wrote Mad Men on metal rim tags. It made returning the right glasses so much easier.

 And of course what is a party without food? I raided my mom's china cabinet for some authentic 1960's serving dishes. So fun!

Kind friends brought food. Thanks Marshal & Cherolyn, Leslie and Rik & Ali. They brought awesome 1960's inspired food. We ate Pigs in Blankets, Deviled Eggs, Salmon Mousse, Shrimp Cocktail, Chips and Dip, Jelly Rolls and other yummy goodness.

We kept the rest of the decoration to a minimum. A cocktail banner.

And Mad Men inspired hoop art.

A fun evening indeed.

June 4, 2012

Flower Boxes

 We live on a corner lot. And this is the side of our house. There used to be a very large tree on the corner. It was beautiful. The canopy was large. Although it was close to the road, it hid the side of the house. Now we're left with this.

I took this picture a few weeks ago so the garden has begun to fill in around the deck. The satellite dish can come down since it was left by previous owners. It just hasn't happened yet. The wires have to stay. Well, if we want hydro they do. I've tried to resurrect the grass. We'll see. The awning which is hidden by the magnolia tree will be painted, but I'm waiting until it's consistently warm at night so the paint can cure. Soon. I'd love to replace the awning with something beautiful, like a singled porch with pillars, but that's not happening anytime soon. I'd love to re-do the side walkway. It's a mess. A big mess. Pavement (driveway) to gravel to interlocking stone to gravel to old concrete sidewalk. That's the path you take to get to the side door. Horrible I know. It was like that when we bought the house. And unfortunately it will have to stay that way for a little while longer.
But not all hope is lost. There is one thing we can do.

 Thank goodness for this man.

For Mother's Day he built me flower boxes. In one day. Well, an afternoon really. See the strange box in the middle? He even figured out how to build a flower box around the deck post. Clever man.

Beautiful flower boxes painted a charcoal grey. 

They are filled with flowers that were once in hanging baskets. The grocery store had an amazing deal on hanging baskets. I took the plants out, pulled them apart and replanted them in the flower boxes. Quick and easy - just the way I like it.


Now the walkway may still need to be blown up, but at least I am somewhat distracted by the beautiful flowers in the lovely grey flower boxes. And it doesn't look quite so bare.

May 16, 2012

Building A Smoker - Part 2

While the girls were enjoying their Mother's Day Tea, the boys were busy installing windows at my parents' place. Andrew did get a few moments to work on his smoker though! These photos were taken at an earlier smoker building session. You can read about the first part here.

To build the smoker, Andrew formed two barrels. One large and one small. It involved a lot measuring, welding and grinding.
 Measuring.

 Welding.
 More welding.
And still more. Slowly, it's coming along.

March 9, 2012

You Make Me Feel Lucky

Every once in a while, I need to declare my love for the man that I've been married to for almost 17 years. I'm not mushy. But I do love him so. This just seemed to fit. I was inspired by this post by Elsie Larson at A Beautiful Mess, in fact I even pinned it. I also pinned this sweet little clover. Time to put the inspiration into action.

I grabbed all those scraps from left over projects - mostly from when we refinished the basement.

I cut them and nail them to two pieces of wood that run vertically behind the boards. The strips of wood are all different sizes. I like the look. Not perfectly lined up, not exactly the same length. Definitely different widths and thicknesses.

Next up, paint. I just used some white paint that was left behind by previous owners. No priming, just a quick lick of paint.

Now the fun begins. My message to my love: you make me feel lucky like a four-leaf clover. I dug out some vinyl lettering left over from another project and that has been used time and time again, which meant that I had to improvise. In several places I used two letters to make one (look closely at the r's and the first e and the blue K). If you don't have vinyl lettering lying around, you can find it at an office supply store.

Once you have the vinyl stuck firmly in place, paint over it. I chose a green that, again, was left in the basement by the previous owners. It was a quick paint job. Some of the white still peeks through.

Next, pull out the stamps. And fight off the 8 pound puppy that is eyeing the stamps. You could avoid all the trouble that crafting on the floor with a curious pup brings, but where's your sense of adventure? I like to live dangerously.

While you are waiting for the green paint to dry, stamp out the remaining words. If you don't have stamps, you could use the same process as above with vinyl. I just didn't have vinyl letters that were small enough to fit, but I did have stamps. Once the paint is dry, carefully remove the vinyl letters.

To make the shamrock, cut out 4 leaves. Each leaf looks like a top of a heart. Sew a running stitch across the bottom of each leaf and pull the thread tight. A small rectangle becomes a stem. I used green flannel because it was what I had, but felt would be great. Glue it on to the board.

Give it to your love. Who declares it is great. And asks if you are going to share it on the blog.


Sharing here:
  beneath my heart  
HookingupwithHoH ”LIL  Today's Creative Blog The Girl Creative Funky Junk Interiors Visit thecsiproject.com
Related Posts Plugin for WordPress, Blogger...